Help topics
- Purpose of the site
- Compass features
- Compass menu
- Compass or GPS - advantages and disadvantages
- Compass Test
- Draw a single or multi-legged route
- Extending the compass direction of travel arrow
- False readings when using a compass
- Fine Tuning the OpenStreetMap Compass
- Getting started with OpenStreetMap Compass
- GPS or Compass - pros and cons for navigation
- Grid references test
- How to use a compass
- Import OpenStreetMap routes
- Key
- Latitude and longitude positions: degrees, minutes and seconds
- Magnetic declination or variation
- Magnetic declination or variation adjustment
- Magnetic declination or variation calculation
- Map projections
- Map reading
- Map reading skills test
- Menu
- Moving the OpenStreetMap Compass
- My OpenStreetMap Compass Map Routes
- Negative magnetic declination or variation
- New Features
- North: different types
- North on OpenStreetMap
- Ordnance Survey maps integration
- OpenStreetMap Key
- Panning and Zooming with OpenStreetMap
- Positive magnetic declination or variation
- Print Map Function
- Projection of OpenStreetMap
- Route drawing
- Route Information Display
- Safety
- Save and Store OpenStreetMap Compass Map Routes
- Single leg or multi-legged routes?
- Test your compass reading skills
- Tips
- Types of bearings
- Updates
- User Guide
- Watch as Compass
- What is a compass?
- What type of compass is used on the site?
- Zooming with OpenStreetMap
OpenStreetMap Compass User Guide

1. Open the application and select either Draw Single Leg or Draw Multi-Legged route

2. Select a starting point using the Google Search Box and enter a city, town, place, or a latitude/longitude directly.
3. Clear the Google advertising that appears by clicking the Clear Results link.
4. Drag the OpenStreetMap zoom slider tool to select the required map scale.
The map scale cannot be adjusted after this stage without restarting the application.
The map scale cannot be adjusted after this stage without restarting the application.
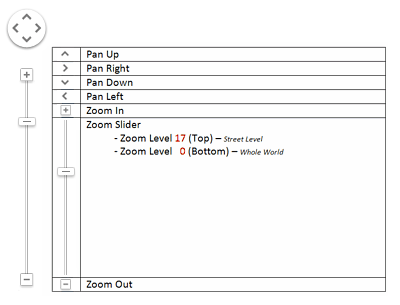
5. Click on the 'Show Compass' button that appears in the lower-left corner and the compass will appear on the map near your specified point.

6. Drag this compass so that its centre sits on top of your starting point.
7. Click on the compass to let you rotate it to the desired direction; click again to freeze it.
A digital readout of the compass bearing appears in red in the top right hand corner of the map. The compass can be adjusted and fine tuned by entering the number of degrees in the box. Press the Enter key on your keyboard to effect the change.

8. In the upper-left corner, a Menu Button will have appeared that lets you:
- Undo/redo steps
- Clear everything and create new routes
- Preview and print the map(s)
- Preview and print the route information
- Load/Save/Import a Route
- Have a unique URL/ID emailed to you so that you can access/import it later
- Maintain a free online 'My Routes' account.
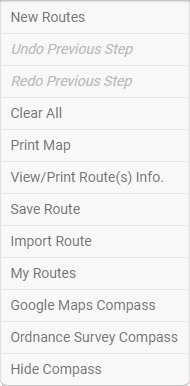 To open the menu, put your mouse over the 'Compass Menu' button.
Move your mouse out to close the menu.
9. Change the length of the compass red direction of travel arrow by slider or by manual dragging so that its end is at your desired destination.
10. In the upper right corner, the 'Draw Route' button shows up, together with the unadjusted compass or true bearing display.

The 'Draw Route' button replaces the 'Map Style' button:

The 'Map Style' button reappears when the 'Hide Compass' button is selected:

The 'Menu' button disappears when the 'Hide Compass' button is selected. Click the 'Show Compass' button to restore.
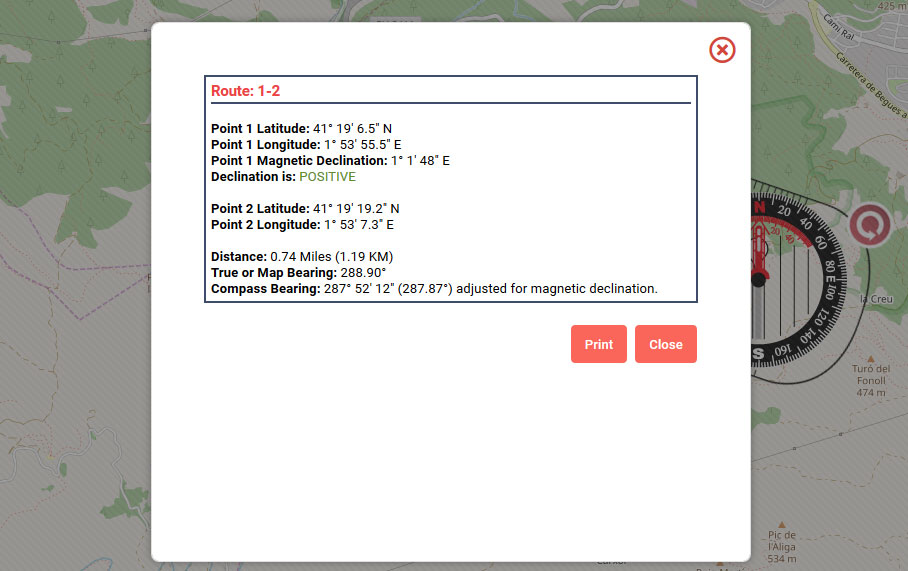
11. Clicking on the 'Draw Route' button will plot and draw a route to a marker at your selected point of destination and display:
- Origin latitude, north or south, in degrees, minutes and seconds.
- Origin longitude, east or west, in degrees, minutes and seconds.
- Origin magnetic declination, east or west, in degrees, minutes and seconds.
- Negative or positive declination.
- Destination latitude, north or south, in degrees, minutes and seconds.
- Destination longitude, east or west, in degrees, minutes and seconds.
- Distance of the route leg in miles and kilometres.
- Map or true bearing in degrees.
- Compass bearing, in degrees, minutes and seconds and decimal, adjusted for magnetic declination.
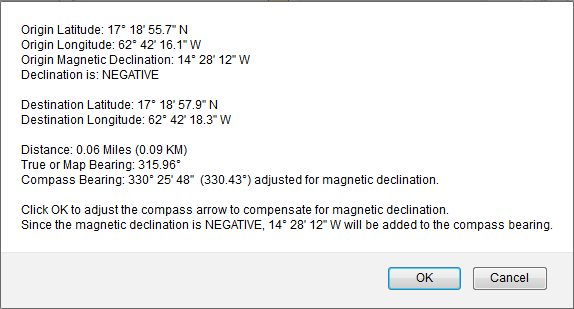 Clicking 'OK' on the display will adjust the red compass direction of travel arrow to compensate for magnetic declination. The compass bearing display adjusted for magnetic declination (12.34º in the above example) will appear in the lower right corner.
The map or true bearing display appears in the upper right corner (342º in this example).
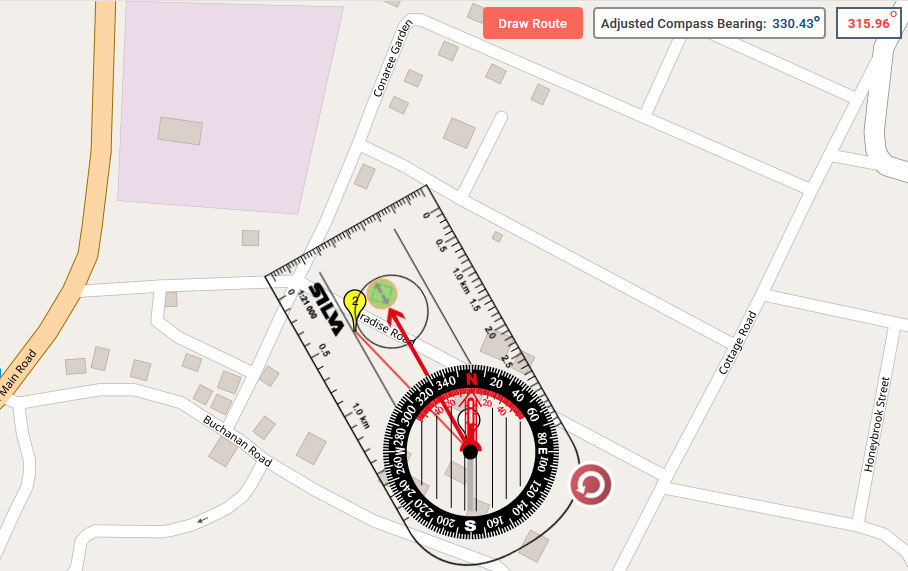 Clicking 'Cancel' will leave the red direction of travel arrow unadjusted, and no compass bearing display will appear in the lower right corner.
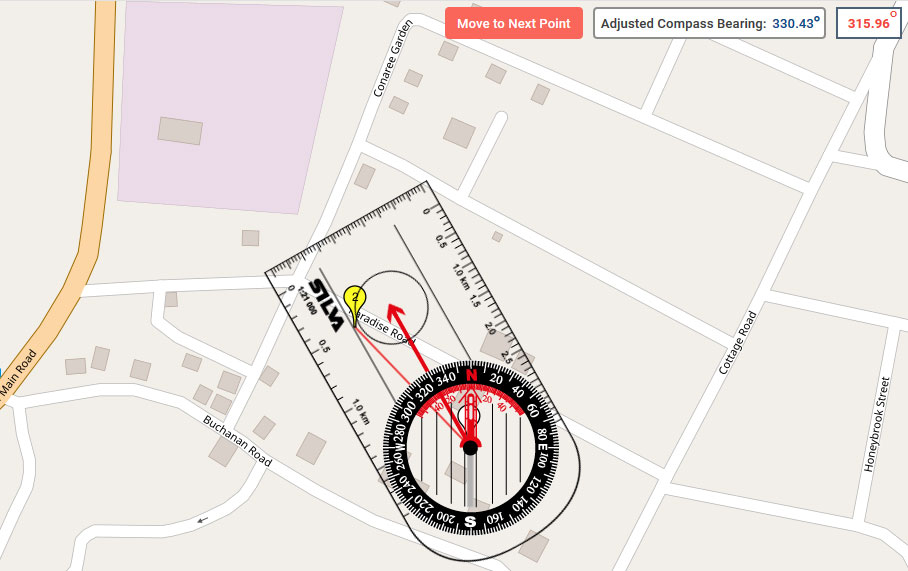
For Multi-Legged routes, click the 'Move to Next Point' button to move the compass to the next point:
 Once you have finished, you can hide the compass, save and print your route:
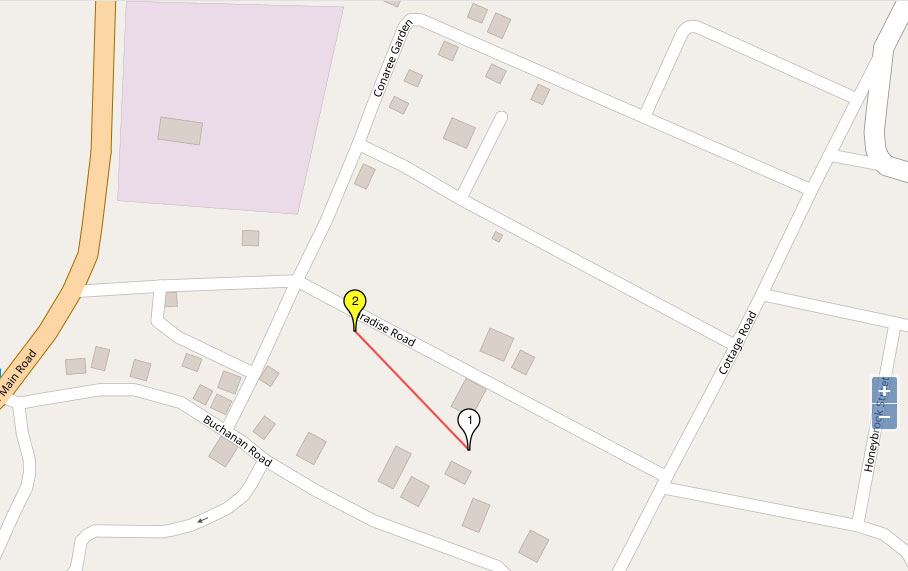
...and View/Print the route information and maps: View the route information
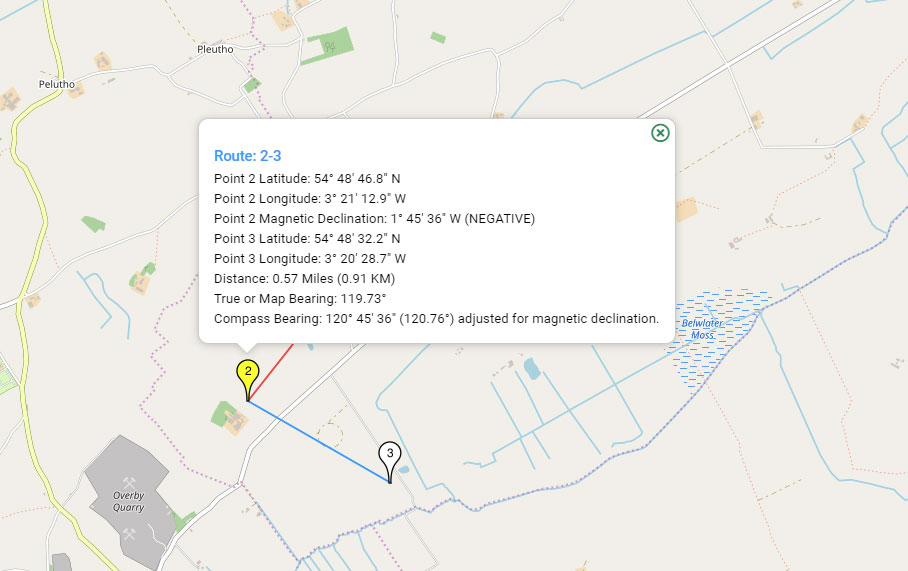
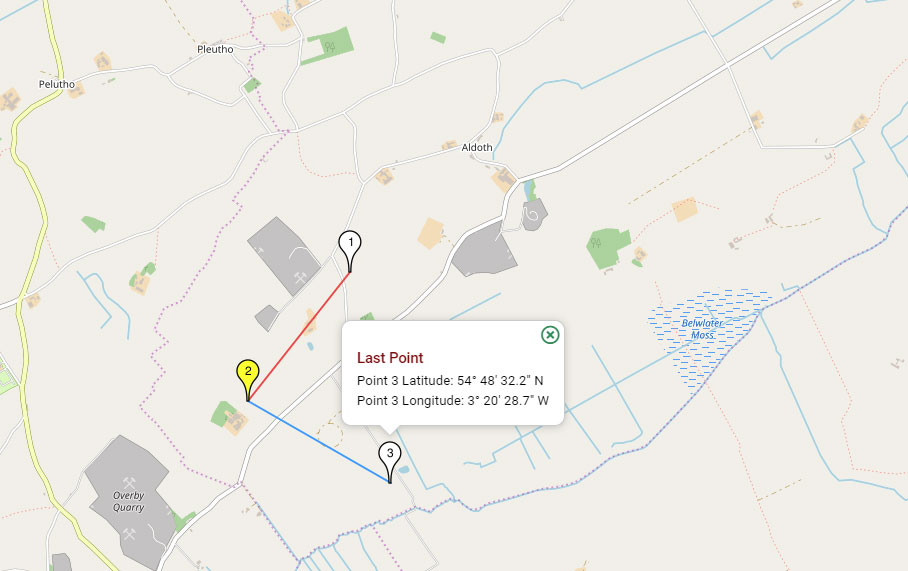
Clicking on the start or intermediary route point marker displays its latitude and longitude position as well as the map bearing, distance to the next marker and the compass bearing adjusted for magnetic declination.
Clicking on the last route point marker displays its latitude and longitude:
12. Now save your route using the 'Save Route' menu option. You will be provided with a unique route ID/URL and have the option of having this emailed to you. The route ID/URL allows you to access/import it later.
13. Providing your email address at the time of saving your route ensures you can access your routes online at anytime using the 'My Routes' menu option. Your email address is the only identification you will need to access all your saved routes.
Tips
1. Use the 'Maximize This Map' option to generate a large map window to work with - it makes things a lot easier.
2. The current view of the map can be panned to a new position by pressing the left mouse button and dragging the map.
3. Bearings are given in both absolute map numbers, and compass-corrected for the local magnetic declination value, which is also listed. If your compass lets you adjust the magnetic declination, you have the option to do that and use the uncorrected map bearings.
Copyright © 2019 - 2026 All Rights Reserved
Barcelona Field Studies Centre S.L.